Aero Modeller old issue n°745 p.38 - Dec. 1997 - Lubomir Koutny
Macchi M67
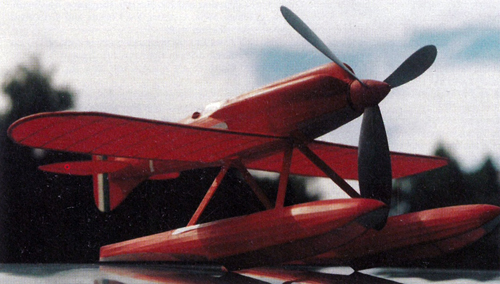
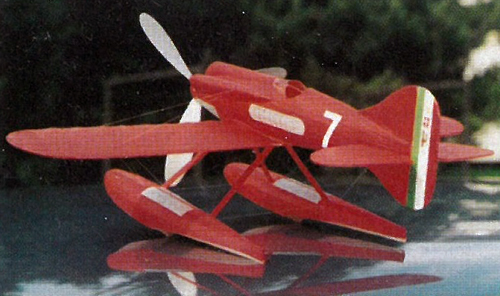
The 1929 M.67 was the best of the Italian Schneider Trophy contenders and, surprisingly, this shapely subject turns out to have the ideal proportions for a Peanut model. To date, three versions of the model have been built, the first by my young friend Petr Mikulasek whose red and white Jap tissue covered model turned out very light and has already won numerous competitions. It can make flights of over one minute after ROG.
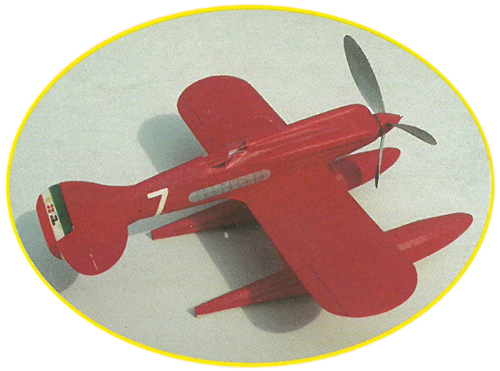
The second Peanut M.67 built from this plan was made by Czech flyer Plsek. His superb scale model was covered with condenser tissue and sprayed with Humbrol enamels. It performed every bit as well as Petr's. The third M.67 was my own. In an attempt to obtain maximum performance while still maintaining fidelity to scale I enlarged the propeller diameter from 144 to 148mm and built a flat wing (no dihedral) with more ribs and a more curved airfoil. The entire model is covered in Jap red/white tissue and sprayed with Humbrol enamels. The result is really very nice from a scale point of view with many details, but it is rather heavy and very, very difficult to trim and consequently a poor flyer. These changes destroyed the stable flight characteristics of its predecessors, so follow the plan instructions and dimensions and you'll avoid my disappointment!
Construction
This superb Peanut isn't an easy model to build and is certainly not recommended for beginners so I won't attempt a blow by blow construction sequence here. If you build the M.67 you'll already have plenty of experience in building lightweight scale models. Choose only the best strong and light balsa and use a light adhesive (in the Czech Republic the best is "Kanagom", thinned 1:1 with acetone or nitro-cellulose thinner).When removed from the magazine, tape the plan down onto your favourite building board and protect it with clear film. You'll need a strong thin razor blade or Swann Morton scalpel for the cutting of parts.
Wing an tail
The wing is built using strip ribs. The leading and trailing edges are laminated as are the tips, from thin strips over a pattern. The lower rib strips are first glued between the leading and trailing edges, then both spars are glued over these lower rib strips. Top rib strips are then glued between the LE and TE over both spars. The tail surfaces are built pinned directly over the plan. The outlines are from two laminated strips of 0.5 x 1mm.
Fuselage
The fuselage has four main axis longerons and about 20 auxiliary. The front formers are laminated, others are made from 1mm light balsa. Dimensions are given on the plan. The three streamlined cowl sections are made from hollowed-out super light balsa or from foam. The nose block has front and back made from 0.6 mm ply. The floats are built in exactly the same way as the fuselage .The struts are made from strong balsa and those shown on the plan were to accommodate the larger prop on my version of the model. Make yours about 1.5 mm shorter than shown and use a 144 mm diameter prop. The cockpit has the front glass shield made of 0.2mm thin cellulose. The instrument panel is small photocopy of a photo and the pilot figure is made of foam.
Propeller
The prop has a spinner built up from balsa circles. The central disc is cut into three segments with 120 degrees spacing to allow three 1.5 mm paper tubes to be glued in to hold the blades. The blades from strong 1.5 mm balsa and have pegs from 1.5 mm bamboo. They are shaped to airfoil by dampening and twisting over a hot iron, adjusting and checking by the use of control triangles. The prop shaft is from 0.5 mm steel wire with a loop for winding at the front and a hook protected with plastic sleeving for the rubber at the rear.
Covering
Two methods of covering are recommended -coloured Jap tissue applied with water-thinned glue or with super light condenser tissue and sprayed by airbrush with Humbrol enamels. My own model is covered in Jap tissue and sprayed and, of the two, this is the heavier method. For setting-up I use a simple alignment jig (see photo). This model needs a small amount of dihedral (6 mm), very small negative incidence on the right wing and the left circle determined by rudder trim. The propeller thrustline should be 1 degree right with no downthrust. All the bracing is made using super thin fishing wire.
Rubber Motor
Power is a loop about 420mm of rubber FAI TAN II. I have found that this new rubber is better compared to the older Pirelli used in Petr's version of the model - even so, his flew over a minute after ROG on 1400 turns (you can put on over 1800 turns with this new rubber).
Flying
Flying is simple if the total weight is under 10 grams. Check the alignment of flying surfaces and ensure that the CG is in the correct position - it has to be exactly as shown on the plan. Test glides should be carried out in windless conditions over a soft surface. When all is O.K. you can try a powered flight on just a few turns (300) to lengthen the glide. If it is alright you can try more turns, say 600 or so, which will enable you to start to correct the flight circle which should be about 10-15m in diameter. Now try the M.67 on 1000 turns. If the model climbs a half of a circle and descends on the second half, you will have to increase the inci¬dence on the right wing or increase sidethrust to the right. Just enjoy the experimentation until it's perfect - that shouldn't take long if you followed the plan accurately!
I wish you great fun with this little model and many victories in competitions.
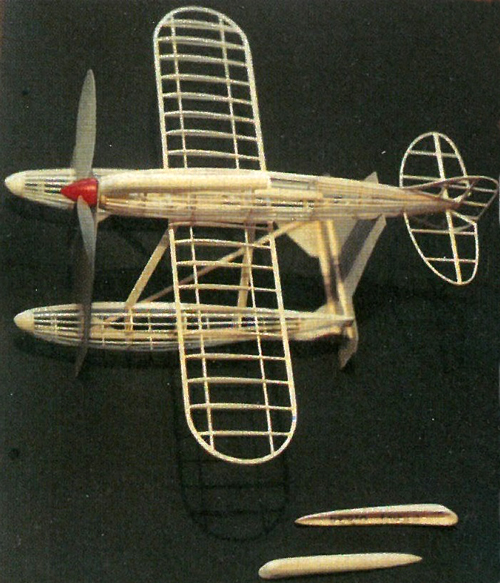
Lovely framework shot of the M.67 before covering. Note simple jig to ensure accurate alignment of flying surfaces and the hollowed-out soft balsa side cowls in the foreground